
According to Forbes, 64% of data migrations overrun their forecast budget, while 54% overrun on time. Meaning, more than 50% of the CRM data migration projects don’t go according to plan, if there was one in the first place.
If you wonder why that happens, you need to look at the root cause. It’s the migration strategy that results in such upheavals.
This guide walks you through exactly how to do it right. From auditing what you have, to cleaning, mapping, testing and going live without losing a single record that matters. And you can apply this plan even if you have a small team. It’s a step-by-step guide consisting of four phases that will give you the organisation and clarity of process you need for CRM data migration.
Phase 1: Preparation
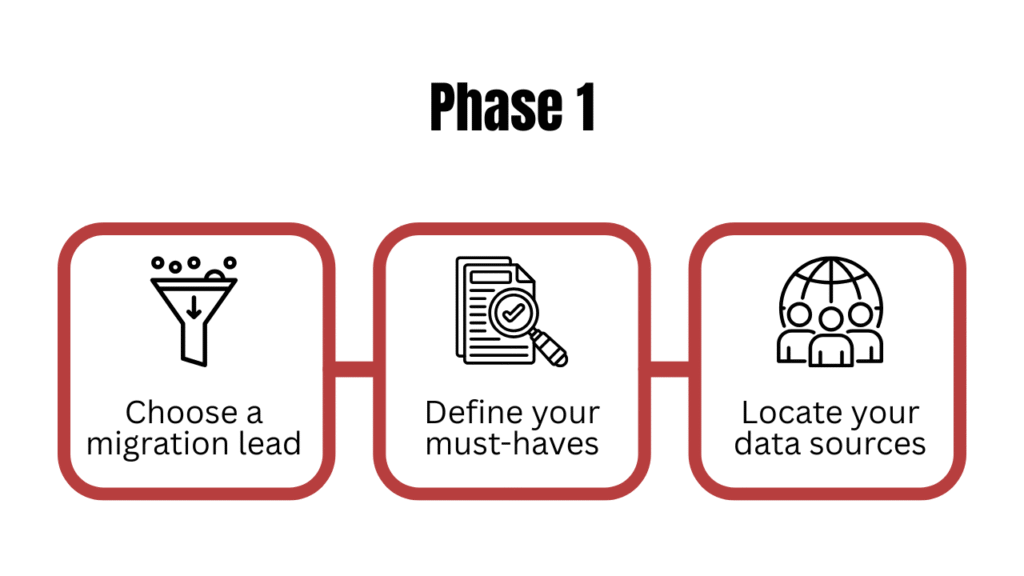
Choose a migration lead
Just like we make project leads so there’s one person in charge to maintain proper workflow, we need one person to take charge of this task too. They could be a CTO, Head of Sales, or an Ops Manager, depending on your company structure. They will be responsible for making decisions, keeping things moving and will be accountable for the project. Just like a project lead.
Define your must-haves
Now, sit down with your migration lead and decide what data needs to be in the new CRM based on your CRM goals. We will only migrate what’s necessary; the rest is just clutter. If you don’t have clear and specific CRM goals, you need to work on your CRM implementation strategy before you plan the data migration.
Here are a few questions to help you define your must-haves.
- Which data is non-negotiable? Active deals, current customers, open support tickets.
- What’s the cutoff date? History older than 2 years has little operational value for most. Pick a cutoff and stick to it.
- What’s actively used vs. just sitting there? If nobody’s touched a field or report in 12 months, leave it behind.
This analysis will give you clarity on what needs to be in the new CR, what’s being left behind and why.
Locate your data sources
The next step is to know where your data currently is. If you’re migrating to a new CRM, most of it will be in your current CRM. However, if you’re migrating first time to a CRM, spreadsheets will be the main data source for most companies. But in both cases, there could be some data here and there, like:
- Your current CRM
- Spreadsheets
- Email marketing tools
- Billing and invoicing software
- Support tools
- Inboxes
You need to decide whether you’re pulling data from these other sources into the new CRM or not. And how will you know that? Well, your must-haves will guide you.
You need to know about every single data source upfront, because finding a surprise data source mid-migration is one of the most common reasons timelines blow up.
Phase 2: Data hygiene
Once you have done the preparations, the next phase is to clean the data, so when we migrate, we don’t bring duplicates, incomplete information and unnecessary data into our new CRM.
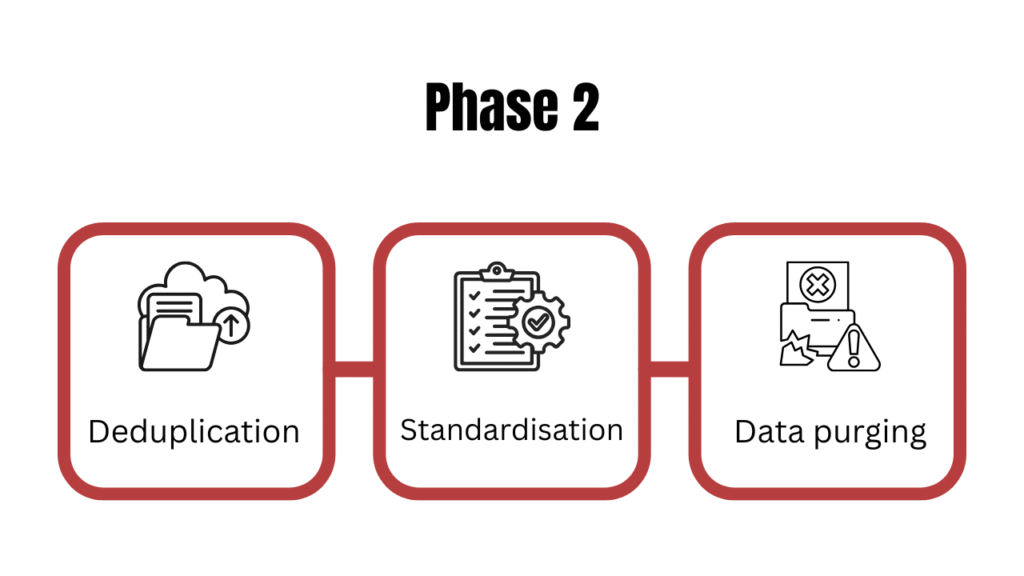
Deduplication
It’s much easier to delete a duplicate in a spreadsheet than in a live CRM.
- Start by exporting your contacts and companies to CSV.
- Run deduplication logic against the fields most likely to identify the same entity. The email address is the strongest signal for contacts, the company name and the domain for accounts.
- Most CRMs have a native dedupe tool. If yours doesn’t, tools like OpenRefine handle this well on flat files.
- When you find duplicates, merge them rather than deleting. You don’t want to lose information; you need to capture the complete record.
Standardisation
We need to have everything in one standard format. Here are some common standardisations to consider.
- Dates: Is there a mix of formats across different sources?
- Phone numbers: Some with country codes, some without, some with dashes, some without.
- Country and region fields: “United States,” “US,” and “U.S.A.” are all the same thing, but your new CRM will treat them as three different values.
- Name casing: “john smith,” “John Smith,” and “JOHN SMITH” are three different entities.
- Picklist values: If a dropdown field has been used inconsistently (“SME,” “Small Business,” “small biz”), consolidate those values now before they become separate options in the new system.
Pick one standard format and normalise it across all data.
The fastest way to catch these issues is to sort each column in your exported spreadsheet and scroll through the values. Inconsistencies jump out immediately when you see them grouped.
Data purging
The last step of data cleanup is to go through your database and remove records that have no business value.
- Bounced email addresses
- Stale leads with no activity
- Test records
- Former employees
Purging might feel risky. The instinct is to keep everything just in case, but you need to push back on that instinct. If you genuinely need an archive, export the purged records to a CSV and store it somewhere before you delete. This way, nothing is lost, but it’s also not cluttering your new system.
If you want to know more about data hygiene, you can read: 4 steps to CRM data cleansing and its automated upkeep
Phase 3: Technical mapping

This is where the technical work begins. Mapping means deciding where everything goes in the new system. If you get this phase right, the actual migration becomes pretty straightforward.
Build a mapping document
A mapping document is a simple table that connects every field in your old CRM to its corresponding field in the new one. Start by exporting the full field list from your old CRM. Then open up your new CRM and do the same. Put them side by side and start matching.
Your mapping document should at least capture:
- Source Field (Old)
- Destination Field (New)
- Field Type
- Comments if any
A few things will happen as you build this:
- Some fields will map cleanly. First name to first name, email to email.
- Some fields will need transformation. A currency stored as plain text needs to become a proper currency type; a “Full Name” field might need to be split into first and last name. Document the transformation rule clearly in the comments column.
- Some fields will have no destination. You have three options here. Create a custom field in the new CRM to house this data, map it to the closest available field, or drop it entirely.
- Some fields exist in the new CRM but not in the old. Leave these blank in the mapping document. They’ll get populated over time as your team uses the new system.
Create custom fields
Any field with no native home in the new CRM needs to be built as a custom field before importing. Otherwise, the records will either fail to import or will be silently dropped.
Build the fields, verify they’re saving correctly with a manual test record, then proceed. Here are common examples of fields that often need to be custom-built.
- How did this customer originally find you?
- The internal team member responsible for delivery
- Contract renewal date
- Customer tier
- NPS Score or last survey response
Phase 4: The pilot migration
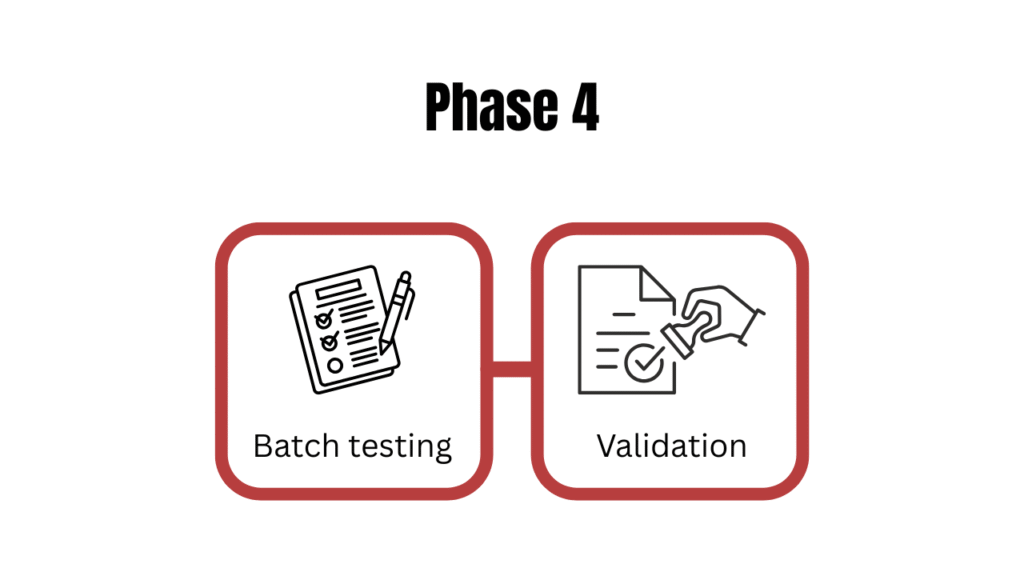
Before migrating the whole thing, we need to test on a small, controlled set of records, in a safe environment, with enough time to fix what doesn’t work.
Batch testing
You want records that stress-test every part of your mapping document. Look for contacts or companies that have:
- Multiple associated deals, some open and some closed
- Long activity histories: calls, emails, meetings, notes
- File attachments
- Custom field values populated
- Links to multiple other objects (a contact linked to a company, linked to a deal, linked to a support ticket)
- Edge cases: unusually long text in notes fields, special characters in names, multiple email addresses
Select 10 to 20 such records and run them through the migration first. The goal is to surface every category of error before it scales.
Validation
Once the pilot records are in the new system, go through each one manually. Don’t rely on import success messages. They tell you a record was created, but can’t assure it was created correctly.
Check the following for every pilot record:
- Field accuracy
- Relationship integrity
- Notes and activity history
- Attachments
- Custom fields
Build a simple validation checklist and go through it record by record. Mark each one as passed or failed, and document exactly what didn’t work and why. Whatever breaks in the pilot, go back to your mapping document and fix the rule.
Phase 5: The full migration
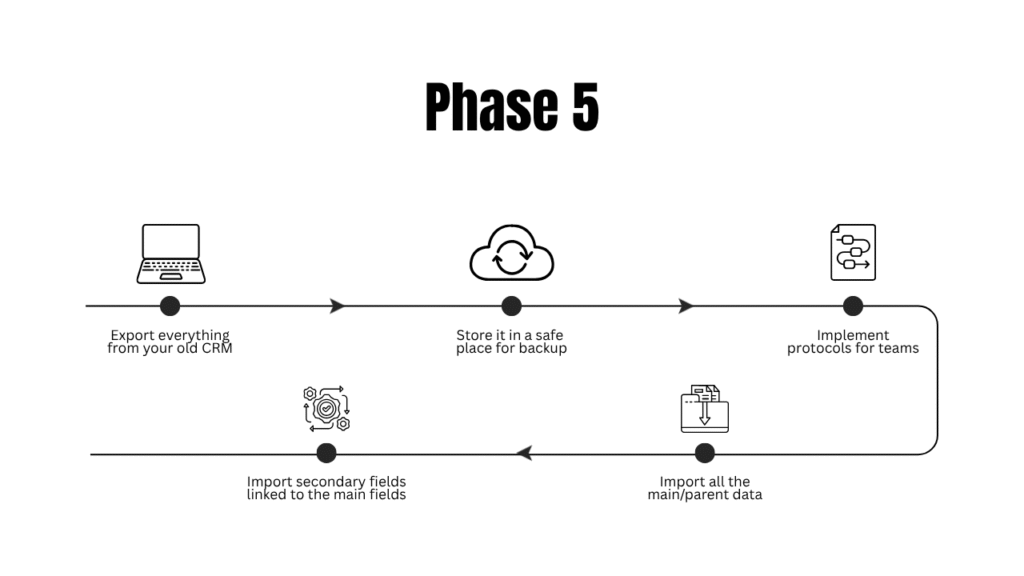
Now it’s finally time to complete the crm data migration.
First, export everything from your old CRM and store it in a safe, separate location away from your working files as a backup.
Next, lock the old system. Pick a specific date and time, tell the whole team, and from that moment, nobody touches the old CRM.
And now you start importing in the right sequence. Import all the main/parent data first, then the secondary fields linked to the main fields. For example:
- Accounts (companies): Everything else links to these, so they go first
- Contacts: Link to companies, go in second
- Deals and Opportunities: Link to both, go in third
- Activities and Notes: Go in last, once all parent records exist
Closing remarks
If you’re happy about your new CRM and thinking it’s an upgrade, then I hate to break it to you, but it’s not, at least not yet. Right now, it’s just an empty system with a prettier interface. What makes it an upgrade is the data inside it: How clean, complete and trustworthy it is.
Every shortcut you take during the migration lives permanently in that data. Every field you don’t map properly, every duplicate you don’t merge, every dead record you carry across. The tool doesn’t fix any of that. Only you do, and the window to do it is the migration itself. So use it wisely.


![How to use AI in spend analytics? [5 use cases]](https://feriotti.com/wp-content/uploads/2026/04/1-3.png)